Sunday, December 18, 2022

Stress Free Stitching

I turn my attention to counted thread embroidery in these latter days of the year. 

Sometimes we need an intense challenge, but the holidays have their own challenges. We don't need more. But neither do we want boredom. Rather, our souls seek a comfortable balance. Winter, in general, can be stressful with bone-chilling weather, and light deprivation.

Blackwork, also known as Holbein embroidery, after the 17th-century portrait artist in the court of Henry VIII is a favorite of mine. Others are pulled thread embroidery and Hardanger. Almost any embroidery stitch can be worked over a set number of threads. 

From the book Blackwork & Holbein Embroidery, book 2, by Ilse Alrherr (self-published), this pattern has been modified. The book is out-of-print. Attempts to contact the author for permission to reproduce part of her pattern were fruitless. The modification makes the border narrower and required a re-design of the corner motif to compensate for the change.


In my long life, I have observed that trends in the fiber arts market turn to the predictability of counted thread work when the social climate and world politics are uncertain and unstable. The year 2022, coming hard on the Covid 19 pandemic and disputed political outcomes have been unsettled with little to suggest an impending change.

I have worked on several of the patterns in my books by Altherr, and consider her a master of historical hand embroidery. I took a class from her in the 1980s in Mobile, Alabama through the local Embroiderers' Guild. I chose this pattern for a specific piece of fabric that I wanted to use as a table centerpiece and worked it in ecru pearl cotton on Hardanger cloth.


Friday, November 11, 2022

A.B.C.s of 1 x 1 Cables

Bromefields Knitting Shop on Etsy

Knitted Cable Sourcebook

Infinite Cables

Cables - 

cars, telegrams, landline telephones, lifelines, internet, KNIT !

Who doesn't love cables? 

What follows here are my observations while learning to knit cables. Listed above are some excellent sources for those interested in furthering their cable knitting education. As always, nothing on my page is a 'paid advertisement.'

  1. The first listed is an inexpensive booklet on some traditional cable variations.
  2. Norah Gaughan presents a comprehensive study of cables.  
  3. Melissa Leapman presents her class on working cables as an icon, instead of a vertical row.
         Note: In the book, Norah presents a lovely edge stitch that she does not explain in the book. Being the lovely person she is, she gave me the 'recipe' along with permission to share it with you.


A cable, in its simplest form, is comprised of multiple strands. In the case of knitting, a cable requires more than one stitch. A Bavarian Twisted Stitch (also on Craftsy) is sometimes called a 'traveling stitch' and uses a 1 x 1 pattern. It's similar but is not quite the same, being knitted through the back loop.

Technically, a 1 x 1 cable stitch is not a 'traditional' cable stitch. As originated with Aran Sweater knitting in the British Isles, cables are made with a 2 x 2 (or more) sequence.

My hat pattern is from the Bulgarian knitter Elena Dimchevska, on Ravelry.


Used with permission from the designer


What made this hat so much fun for me, a challenged knitter is that it is cable-simplified, but not simple. I made mistakes, but part of my challenge was to keep on knitting by either making a way to continue on with the correct number of stitches, or drop back and repair one or two stitches - but not rip out an entire row or pattern repeat. That in itself is a learning experience. Again, the mantra is Swatch, Swatch, Swatch.

To the Good Stuff - 

The A.B.C.s of 1 x 1 cables

A. The forward stitch will usually be knitted - unless the designer says otherwise.

B. The behind stitch will usually be purled - unless the designer says otherwise.

C. Both stitches are knit when you want to create an X, or the behind stitch will become a forward stitch very soon, as in the next pattern row.

D. Stitches might be Knit/Purl when you want the forward stitch to lean to the right.

E. Stitches might be Purl/knit when you want the forward stitch to lean to the left.

F. Why aren't the stitches interchangeable? Because you are usually working right to left.
Unless you work left to right sometimes, and right to left other times.

Unless the designer tells you to do it differently - 


Wednesday, November 9, 2022

Crochet Cotton vs. Knitting Cotton Yarn

 What's the difference?

Consider the crochet "doilies" popular in Victorian decor. That trend lasted well into the 20th century and is still revered by some.

The crocheted doily was a knock-off of historic laces, that had been practiced for centuries but required skill and specialization. To this day, crochet is considered a 'lesser ' needle art in some quarters. Not this one.

Lacis, a favorite of Mary, Queen of Scots is, in my experience the most difficult of all the lace techniques. It requires the lacemaker to first knot a net as a base. Then to embellish the net, she or he enters the net with the needle at one point and weaves. If the lace has been executed correctly, the needle will emerge at the same place it entered the net when the weaving is finished. 'Net weaving' is a less complex version of Lacis and is often done on a commercially made net.

In crochet, the 'look' was accomplished by the technique "Filet Crochet," wherein the embellishment and the netting was created at the same time, row by row.

Knitting is a different discipline altogether. While lace can be knitted, not all knitting is lace. The same could be said of crochet, however, so what is the difference?

Crochet was popular for home decor, back in the day. It was washed often and must withstand chlorine bleach, or harsh sunlight. Knitting was most often done in wool, but we are discussing cotton here - so what about knitting? Both crochet and knitted items are popular today.  

Using crochet cotton for either knitting or crochet means using a more firmly spun thread, while cotton prepared for knitting is often softer. It is up to the user which they prefer.

Color Coding Your Chart

 I love color coding. I got my first BIG commission for introducing a color-coded filing system to Boeing in the 1960s. It was for the 737. Don't blame me, it was only the files.

To move on, I have had a lifetime of experience with color - and coding - and color coding. 

Today I am applying the principles to 'Knitted Cables.'

Fortunately, the color wheel has more than 3 primary colors: Red, Blue, or Yellow.

We get to use secondary, or even tertiary colors.

To make it even more fun - we will distinguish between warm and cool colors. And light and dark colors! What a festive array!

Secondary colors are what you get when you mix two primary colors: Purple, green, or orange.

By now you may have noticed that some colors are easier to see if they are darker. For example, 'orange' has been made 'brown' so it can be seen easily.  (I have not shown yellow at all, except - see below) !

But, if I put any color within a black outline, it is seen much more quickly. Even white  will show up if it has a boundary of black - as in:


(Black on black defeats the purpose of the illustration)

Notice that yellow and black have the most contrast. That is because yellow is a warm color, while black, like white, is neutral. Grey without an outline, almost disappears from the page. Also, scientifically, black is either all colors or no colors, (I forget which) and white is the opposite, but black is dark and shows up well.

Typographers will use those features of colors to give their message an impact. But everyone enjoys color - as witnessed by movies and tv producers.

Given that yellow, and its neighbors, red and orange, are warm colors and appear to come forward if I am illustrating a stitch that comes forward I will use a warm color.

Likewise, a stitch that lies behind a stitch that comes forward gets grey, outlined in black. Because it is behind - and harder to see.

That takes care of 'knit' and 'purl' - but what if your cable is ' knit - knit' or 'purl knit' ? Or 'knit - purl - knit'?

That is when we use tertiary colors and values. 

Tertiary colors happen when you mix two secondary colors, or a secondary color and a primary color.

They will show up as 'lavender-blue' or 'red-violet'.

The Value is seen as the lightness or darkness of a color. Such as 'red' vs. 'pink', or black vs. white.

So we have a whole array of colors, and values and temperature to record our data. And that doesn't even touch on texture. Y'all know what texture is - all touchy/feely.

Wednesday, November 2, 2022

When vision fails . . .

If we are lucky, we are blind from birth and can learn to see in other ways, from birth.

If we are lucky, we lose our vision gradually and can find ways to compensate.

If we are lucky, we lose our vision suddenly but have had a lifetime of seeing.

Either way, we are fortunate and will find a solution.

Here I will share mine, for knitting patterns . . .

I happen to love artificial intelligence. It helps me every day to find solutions to my problems.

For my waning vision, even after cataract surgery, I bought a good scanner.

  1.  Print my downloaded knitting pattern.
  2.  Scan it at 300 D.P.I. - dots per inch.
  3.  Open the 'picture' taken by the scanner in a photo manager with editing capabilities. I  use Microsoft Paint for simple tasks.
  4.  Resize the image to what you wish, making it smaller. For most knitting patterns, this gives me about 20 rows of knitting per portrait-layout page. In 'Paint' all I have to do is print in a portrait (or landscape) layout. I like approximately 3 rows to the inch.
  5. Now my pattern is large enough to color the squares, if desired, and can be seen easily from a distance when placed on my magnetic board.


Note:  Chart is for Milka Hat - found in Ravelry.Com
Used by Permission from the designer.

Thursday, October 20, 2022

More Knitting Progress

 I found a wonderful chart on Pinterest. When  I went to the source, I could see it was partial - which means to me that it has been ripped off someone.

Regardless, I loved it and will not share it. But it brought to mind, I needed to play around with cables again.

Since I re-chart everything to compensate for my 'traumatic brain injury' I had to come up with a way to chart the cables in a way that gives me a little extra help. Cables were not on my keyboard for knitting symbols, so I must do them by hand. 

This is the paper I came up with to make a 'key' - Please feel free to copy my template. It is PUBLIC, for free, as in, not selling anything.


This was made in "Paint" the free graphic generating device, and Excel from Microsoft.


Sunday, October 9, 2022

Conclusions of exercise: Bruno in a Beaker

 Next time - 

I won't 'activate' the Inktense color with a wetting agent until I consider the work 'done.'

    Layering color as you would with watercolors on paper may not work. Subsequent layers may not be permanent.

I will baste the fabric inside of the wooden frame, to allow it to lie flat.

I will "test" wash as many samples as necessary before working on the final piece.

    Maybe I will do two samples, and wash one vigorously, and one washed gentlyto test the permanence of the color. 

If I give these mug rugs as gifts, I don't want them spoiled with a first laundering.

How do I know to take that into consideration?

Think black silk boxer shorts.   

I may activate the Inktense with a liquid fabric medium, though it does add some stiffness to the fabric. I wonder: if I mixed it with water would it still work? Would it bleed?

Would gel outside the line of the painting help to control a hard line of color? 

With every answer, there are more questions.

Bruno in A Beaker

 What works . . . 


Orignal drawing and tracing to yellow tracing paper for transferring to the fabric. The cup in the original drawing was from a shiny cup in my collection. It would not show a good value study because it was too shiny and reflective. I chose another cup, as seen in the tracing.


Photo reference for the cup.


The sketch on the fabric using Inktense outliner. It washes away mostly. . . but not completely. Test it on your fabric before putting it down where you will want it gone.


First 'finish'  before washing out the gel.


After washing out the gel, perhaps not as gently as necessary. I wanted a good "test."


I didn't start from scratch, but really scrubbed, again, with a poly hot pad, or dishwashing scrubber (it came as a freebie with an order for the kitchen, not sure what it is.)


I re-did the coloring with the Inktense pencils, allowed it to sit overnight, and applied gel. It sat to dry overnight.

I applied white highlights in the eyes with acrylic fabric paint and added black toenails.

The cloth was removed from the frame when the paint was dry.

Following instructions on the acrylic paint box, I pressed it with my dry flat iron (no steam holes) on a polyester setting, for 3 minutes, moved the iron to cover the remainder of the image, and heat set for another 3 minutes. Instructions were to heat set for 3 to 5 minutes, so I felt safe. The number setting on my iron was a '2.' Instructions said to use 212° f, but I can't figure out how to measure the temperature of my iron.

After the fabric cooled, I put it in a tub with wool yarn shampoo - only because I felt it would be gentler than an alkaline detergent. Cotton would ordinarily call for synthrapol or hand-washing dish soap for washing. 

Why? Wool Wash for animal fiber, and an alkaline detergent for vegetable fibers. It's a science thing. 

It soaked with a few gentle swishes for at least 15 minutes, was rinsed, and hung outdoors under the canopy in the breeze. I put some clips on the lower edge to add a little weight. 

Before I added clips on the bottom, I noticed the breeze had folded it up on itself.


Even at a distance, you can see the color remains brilliant. I am satisfied with an acceptable first piece. It will be finished as a 'mug rug' for Bruno's Mom, who lives in the Philippines.

Friday, October 7, 2022

Stretching Fabric for Painting

Update: This didn't work. I think the color needed to be pressed into the fibers/fabric better. I will still stretch the fabric but will reverse the front/back so the fabric can lay on a firm surface to apply the color.  

Other possibilities:

1. Gel was not washed out completely

2. I used a rubber-type hot pad that had many little fingers, and scrubbed to get all the gel

 out. It may have been too much scrubbing.

__________________________________________________________________


I use adjustable stretcher bars, but can't recall where I got them. I've had them for years.

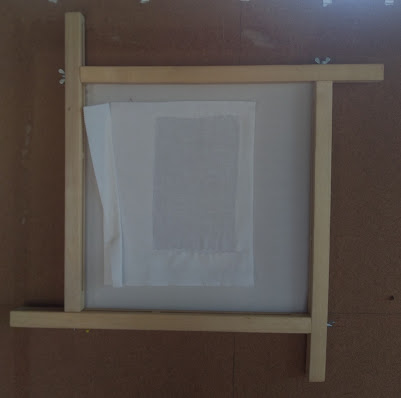
Starting with a 10" x 10" square of Kona "snow" fabric, that has the main lines of the image traced to the fabric. Some areas have been traced with the outline pencil that came with my set, and other areas are traced with the Inktense color I will use, where I don't want a black outline.


Front of stretched fabric


A large piece of cloth is intended for stapling to the bars, to protect the background of the piece, with a window cut away. Before attaching my stretcher cloth to the bars, I stitch the project fabric to the cloth on the machine using the longest and widest zig-zag stitch my machine will handle.


Back Side

New Series: Exploring the Techniques of Fabric Painting

An Overview 

Fabric, art medium, and wetting or binder agents all work together to produce the results you want to achieve. Therefore, before attempting a final rendition, I experiment and explore as many variables as I can think of to reach my goal: Which as always is, Whatever Works.

With a nod to my memory loss/learning disability, I document the results with notes, photos, and swatches, and those images will be shared with you as soon as Google lets me.

When I embarked on a search for tutorials and information, I was frustrated by the limited data in support of the recommended methods being presented. In the spirit of giving too much information rather than too little, I will explore the subject in depth. It will be too much information, too much reading, for some. For those folks I say - you never know when you will need that information in the future.


About Fabric:

Each piece of fabric is unique. Notable differences in cotton fabrics are

  1.  Spinning and weaving methods
  2.  Finishing or sizing
  3.  Size of the thread 
  4.  Number of threads in the warp and weft
  5.  The "hand" - is it soft or firm to your hand?

Thus, I play around with the fabric I intend for my finished piece to discover what works, and what needs more work.    

I  tested Kona and Batik to see if there was a big difference in the weave, by scanning a swatch of each at 600 dpi. Batik (bleached) fabric is a much tighter weave than good quality quilting cotton. I'll use Kona or another quilting cotton for needle-turned appliqué and bleached Batik for raw-edge or appliqué that will be ironed on. 


Considerations: 

The fabric must allow for absorption of the wetting agent, whether water, gel, or fabric medium, while not absorbing so readily that bleeding occurs. I found that stretching the fabric on my adjustable stretcher bars (stitched to a larger cloth that has a window cut out for the painting) allows me to check the back side for good penetration.

Bleeding vs. Blending: 

    Bleeding is when the wetting agent spreads beyond the intended line.

    Blending is what happens when a stroke picks up color from the surface and lays it down on the next stroke. I keep a piece of toweling and water handy to clean the brush often.

Resists: Starch, dried Gel, or other things that prevent the fabric from absorbing the ink.

Over-starched fabric will not allow the absorption of dye and wetting agent well enough for making the image "wash-fast." Some fabric sizing is enough to 'hold the line' but may not allow for maximum absorption

Additionally, Aloe gel that is applied and allowed to dry acts as a resist, much the same as heavy starch:

    I thought I would 'set' the lightest color with gel before proceeding with a darker color to prevent unwanted blending. Then the 'aha moment' came and I tested a piece of fabric with and without gel, and color on top of gel on color. Any color applied over dried gel washed away easily. There was some staining, which tells me I can't rely on the gel as an intentional resist. Fortunately, because my piece was stretched in a frame, I was able to wash out the gel without losing all of my traced lines. We will talk about options for tracing the design to the fabric later.

    How can I use this to my advantage? Let's explore the ways . . . 

Sunday, August 14, 2022

Entrelac - Another way to count rows

Another way to count rows (for Entrelac you want every other row) is to place a marker (that opens) at the beginning of the first and every other row following. To check yourself, if you spread the stitches you will see 2 yarn bits stretched between each pin.


In this example, the pattern is 14 rows and 7 stitches. The needle is inserted through the first stitch to be picked up, while pin-markers show the other 6 stitches for picking up.

After you have loaded the needle with the row that has been picked up and knit/purled, it's a good idea to adjust the tension of the stitches. During the learning stage, the process may feel clumsy, and your stitches will reflect that.


Friday, August 12, 2022

Entrelac and Beyond

Rosemary Drysdale has written two excellent books for those interested in knitting in the Entrelac technique. I opted for the second book and found it in limited supply. 

While I have nothing to add to Drysdale's instruction, there are some tips for those with challenges. 

If you choose to knit using three or more colors, choices are relatively simple. But to use one hue and shade the rows from light to dark, called making a 'value gradation', the task is a bit more complicated. 

Without going into the scientific aspects of light reflection, you can see the value of a color by taking a picture of it and changing the image to black and white. Once you have photos of the different values of your color, you can cut them into squares and arrange them to suit your purpose.

Other methods for viewing color in neutral values are 'red transparency' and 'black mirror.'

To make a 'red transparency': Buy some red, clear wrapping cellophane, and sandwich a rectangle of it between two cardboard frames.

To make a 'black mirror' you would coat one side of clear glass with black paint, and tape the edges for safe handling.

You can see through the red transparency, but the black mirror can only reflect the image.


Pay special attention to Row 4 and Row 5.

In 'Color,' there is good contract, but in 'Black and White,' there is very little difference in value. 


As a swatch, this shows that the more comfortable I am with the pattern, the more relaxed I am, and the tension is looser. 

I also found 2 places where I dropped a stitch doing the SSK. I will pay more attention next time.

Counting Rows

A knitter must be able to count stitches and rows accurately while knitting Entrelac, unlike some patterns that suggest knitting for a specific number of inches or centimeters.

Counting stitches on the needle is fairly simple, especially if you place markers to denote a repeat, or an easy number to remember: 5, 10, or 20, for example. 

Counting rows accurately can be challenging for anyone when the color of the yarn is very dark, but especially for those with vision problems.

When a freelancer, there were times when I needed a backup plan for 'downtime.' I learned accounting and hired out as a temp. Accounting taught me that if you must be accurate, it's good to have more than one way to check your work, as in double-entry bookkeeping. 

There are many methods and devices for counting rows, the following are two that I use:

The Vertical Lifeline

When I first learned to knit, I found instructions for using a contrasting thread to count rows. 

At the beginningof the first row, lay a thread across the yarn that lies between the first and second stitch. If you choose to count at the end of the row, place the thread next to the last, and the last stitch.


If I am working with a 2 row stitch (as in the knit one row, purl one row of stockinette stitch),  I put the thread at the beginning of the row. 

Lay the thread between this pair of stitches in each row.

                                                              Stockinette Stitch, right side.


                                                             Stockinette Stitch, wrong side.

You have knit only half the rows showing on the side you are looking at because the white cord covers the other rows. Count the yarn between the white thread (in this example) and double it to find the number of stockinette rows completed.


 Method #2

Cover the blocking mat with a contrasting color. Pin the knitting to the mat, stretching it slightly to separate the stitches just enough to clearly see them. Count the rows, including the row on the needle, or cable. Ordinarily, unless doing colorwork, you would not count the row on the needle, but this is another of those exceptions when you will.


Happy Knitting !


Sunday, July 24, 2022

Would that worK?

 Chart it, swatch it and see!

While learning from the Craftsy Class: Lace Shawl Design, with Miriam Felton, I followed her instructions to go to stitch dictionaries to find patterns for particular motifs. In this case, I was looking for "leaves."

I found so many variations of leaves and noticed the designers use one of two ways to delineate a leaf on a background: with yarn-overs that produce holes around the leaf, or with purl stitches that raise a stockinette stitch leaf above the ground with yarn-overs accenting the center vein.

A good example of the latter method is illustrated in a free pattern from the website: Knitwise Girl, and can be found here.


Would that work for a hat, knitting on the right side, in the round?

First, I knit a swatch that included 4 pattern repeats, and one and a half row repeats. 

I wanted to work several rows as illustrated, then eliminate the half-drop repeat that fell between two leaves to add shaping to the fabric, to create a crown for the hat.

Using the written instructions I created a chart, but in doing so, I made the error of reading the even-numbered row (WS) from right to left. It didn't matter, until row 15, and while looking for a solution, I scrolled down and saw the author's chart below instructions, as well as a link to watch the video on YouTube. 

"When all else fails . . ."

Here is the original chart by Christine (aka Knitwise Girl)


How many leaves do you see?

At first I thought I saw three: one whole one in the middle, and one on either side. But that was my brain having a mind of its own and making the leap to make me believe I saw more than was there.

Now look at the chart after I ruled out the purl stitch border:

There are only two leaf motifs, neither of them shown as a whole image. That is why it's helpful to make your own chart, and expanding it as much as you need to see a 'whole motif." 

When you have a half-drop surface design, you will have some half motifs within a square or rectangle. Miriam Felton recommends swatching at least 4 repeats of a pattern from a dictionary (which are often charted in a rectangle, and knit flat.)

The chart after isolating the leaves to decide how to modify the pattern for shaping: 

Here I have 'decresed' 2 stitches in row 9 and 10, 4 stitches rows 11 and 12 - progressing to having decreased 8 stitches per half-pattern row repeat, just by not doing the yarn-overs.

But  I wanted that purl border to be yet narrower. By doing a decrease on either side of the middle, I can cut down the number of stitches from 5 to 3.  

I tried a center-double-decrease in the swatch, but it didn't give me the appearance I wanted. The nature of the purled border around the stockinette ground motif is to recede, so the leaf appears to lift forward. Therefore I had to find a purl decrease that does not attract any attention, but blends into the background as much as possible. 

So I hit the books and videos to find as many ways to make a purl decrease on the right side of the fabric as possible, and made a swatch to document what I found, using the same size needle and yarn as my pattern swatch.


Charting alone does not work for me. I need a chart reference but must knit on the swatch to see what works best in the specific project.

Decreasing for the top of the head:

I picked up the knitting at row 8: There are several ways to decrease a pair of purls 

After trying and 'tinking' (knit spelled backward, aka ripping) alternate ways to decrease a purl stitch on the right side to find a pleasing appearance, I chose one and continued the pattern until every other leaf was gone (in the 'half drop' - see the chart above.)

My wig stand came from a big-box fabric store and was on sale for $5.

Hat  Swatch:


Healing - grand but it itches

 Thank you to the faithful followers - as few or as many as you are.

I'm recovering from back surgery. Surgery went very well! Pain relief was immediate, even after the drugs wore off. It was for lumbar stenosis, a very painful thing. If you have sciatica, numbness, and pain - especially in the left leg - get thee to an MRI. It is easier to fix early on.

Computer time is limited until next month. 

One more thing -  I am getting a "lumbar kneeling stool" - it is better for your back than a chair.

Edit: Today, August 2, 2022, I saw the doctor for my "post-op" visit. I asked him about the stool, and he does not recommend it as being very hard on the knees. 

The best advice is that whatever you do- take breaks. If sitting at a computer, get up and walk around. If standing at the drafting table - sit down with a cup of coffee (or glass of wine?)

The draft of the new article should be done soon. Title: "Will this Work?"

Friday, June 3, 2022

How do you eat an elephant . . .?

 . . . One bite at a time.

This is an example of a chart I modified as an example. It is NOT a real chart, and any resemblance to a published pattern is purely coincidental. 


It was too wide to be shown clearly in this space so I have sliced it, and presented it in 2 pieces.


Wednesday, June 1, 2022

Knitted Lace Simple Chart


There's More than One Way . . .

 ...to write a chart !

The examples below are ‘lace knitting’ because the row following the pattern row is a basic stitch (knit or purl).


      This Chart would be knit FLAT.

      Notice that on the even rows (WS) the opposite is worked: 'Knit' becomes 'Purl,' 
      and 'Purl' becomes 'Knit.'

Below is a partial chart of a ‘Bead Cluster’ – found on pg 95 of the Magic of Shetland Lace Knitting, by Elizabeth Lovick, Pub 2013.


Monday, May 30, 2022

The Turtle Is my Spirit Animal


The Legend of the Turtle

 In a dark hollow beneath the forest, an egg began to wobble. The force of the movement caused it to roll a bit in the dark moist dirt. A crack appeared. Then another.

Nothing happened for a few moments, as if the egg needed to rest.

Then a gentle wiggle, and a whop, as the crack grew wider.

Suddenly a claw emerged, with long nails, curved and sharp. The claw was ugly, as if to proclaim the emergence of a horrid creature.

But what followed the claw from the crack in the shell, was a beautiful creature. So stunning in its beauty it shone brightly in the darkness.

Little by little the creature made its way to the opening in the hollow, as if by instinct, seeking the light, and following it to emerge into the brightness of a green spring.

Blinking its eyes against the harsh light, the little creature became aware of hunger. Far in the distance it spied a bush, laden with bright berries. The bush with its fruit beckoned to the creature, as if in invitation, to tea.

As lovely as the creature was, it felt sluggish, and moved slowly. So slowly did the creature move, it caught the attention of a hawk.

The hawk saw the beauty of the creature and cried to its friends: “I will win the day, for I’ve found the most beautiful creature on earth, and when I swallow it, the beauty will be within me, and I will win the day!”

The creature heard this cry and cowered under the leaf, afraid to move any further.

Then, as it quivered in fear, it attracted the attention of the snake. The snake cried: I will win the day!

I see a creature of such great knowledge, and when I swallow it, I will be the smartest creature on earth, and will win the day!”

The creature stilled its tremors and avoided discovery by the snake.

As happens in the forest, a fox smelled a tantalizing aroma, and lifted his head to focus on the source.

He howled: I have found the most delicious, fresh meat! When I swallow it, I will become the craftiest creature of the forest and will win the day!

The creature froze, trying to make itself as small and insignificant as possible, away from the sky and its flying dangers, away from the land and the crawling demons, away from the forest with its gaping jaws.

Then the creature looked at the bush, with the berries, so far away. I am so hungry, it said. Surely, I will die if I can’t eat those berries. But I am so afraid. I am too slow, too beautiful, and too wise for this world. I will surely die. Weary with the struggle, the creature fell to sleep, with only a prayer in its heart to the everlasting Father of the forest and all creatures.

Later when the creature awoke, the first thing it saw was the bush with the wonderful berries. Hunger forced it to move. But it was even slower than before its nap. Still, it struggled forward.

The hawk swooped upon the creature, and just before grabbing it up in his talons, saw only a rock. I was mistaken, he surmised. It happens.

The creature moved forward a few more steps, attracting the attention of the snake, who slithered forward, with the taste of the creature on its tongue. But when the snake was ready to strike, all he saw was a rock. I was mistaken, he surmised as he slithered away. It happens.

Hunger screaming in its belly the creature ventured forward a few more steps. Aha, said the fox. There you are! But just as the fox prepared to pounce, he saw only a rock. Harrumph, said the fox. I suppose I was mistaken. It happens. And he darted off to chase a butterfly.

Whew, close call, said the creature. Ever so slowly it took a few more steps and realized he was directly beneath the berry bush. At last! Thank you, dear Father of the forest. I am saved! He cried.

Thus, the turtle spent the summer in glorious splendor, eating and smiling. He filled his belly full for another long winter sleep in the hollow, under the floor of the forest.


How I Chart Patterns, The Short Version. . .


Saturday, May 21, 2022

Print and Save an article . . .

 Although some photos on the internet are programmed so they cannot be copied, you can still take a photo with your phone. ALWAYS credit your source if you share information. It's just good manners. You know "karma" . . . best be safe.

I doubt my Blog is that well structured. If I were you I would open an article, do a screen print of the page. Then open the screen printed photo of the page in any photo app you have.  I use Microsoft Paint.

You can then edit (crop, resize, rotate) your photo, and copy it to a word processor page. 

Print, or save the article in your file.

Monday, May 16, 2022

On Swatches . .


A 'practice' swatch is not a 'gauge' swatch. It is something I play with to see if I like a pattern: its appearance, rhythm, and whether I can do it with a minimum of frustration. After all, I do this for fun. 

This is a practice swatch of the Rose Trellis pattern found in A Treasury of Knitting Patterns, by Barbara G. Walker (Blue cover.)

It illustrates a 'half drop surface pattern' and was knit in finer thread than I usually do my practice swatches.

  A 'diaper' pattern is an all-over pattern and has nothing to do with baby's garments. "diaper: A pattern formed by small, repeated geometrical motifs set adjacent to one another, used to decorate stone surfaces in architecture and as a background to illuminations in manuscripts, wall painting or panel painting." . . . my note: also used in textiles.


Textured Eyelets is a 'gauge swatch' and serves as a 'practice swatch'. It is from one of the several stitch dictionaries I use.


I made this swatch using yarn scraps from the stash, to distinctly see the different sections.


When I start a new color, I tie the new yarn to the previously used yarn with a 'clove hitch' knot.


It's the Itbe Shawl from Laura Nelkins, but don't expect your shawl to look like this swatch!


I use a bulky or chunky yarn and big needles. My mind is 7 to 17 years old while my eyes are 77 years old. Like a kindergartner using big crayons, I use big yarn and needles. I get Knitpicks™ 'Bare' wool blend bulky yarns because they are good quality, and less expensive. For cotton yarns, I use Brown Sheep Company. 


The size of the swatch depends on the multiple number of stitches, and the all-over pattern repeat. If a pattern is a half-drop pattern I will do at least a set of pattern rows with 3 repeats, followed by a set of rows with 'filler' stitches and 2 repeats, then another set of 3 pattern repeat rows. I try to keep swatches small enough to place in an album. I use either a store-bought ring binder, scrapbook album or make my own if I need an odd size.


There are many examples of stitch patterns in the Stitch Dictionaries available. The stitch count I use depends on the pattern I am knitting, but I don't want to use any more than necessary. It is only a swatch, and has to fit in my album.


If I am following a published pattern that instructs "Work these 2 rows 23 more times" (for a total of 24 rows) I may work them 2 or more times, if needed, to end up on the RS (right-side-of-fabric) and to see the pattern interplay. The pattern calls for an even-number-of-repeating-rows, so that is what I want to do in my swatch as well, to maintain an accurate stitch count according to the pattern.


Note: if I mean 'right-of-center' I will indicate 'right edge' or ROC. Likewise, 'left edge' or LOC (left-of-center). RS always means 'right-side-of-fabric' in Knitting Standards.


This example of Zigzag A, Staci Perry Winter Chill, at VeryPinkKnits (used by permission) illustrates a definite Center, an ROC, and an LOC.