Wednesday, September 15, 2021

Digitally Downloaded Delights !


Smart designers of digital patterns know that to prove their worth, they must give something free of charge. I loved getting free books when I wrote “The Eye of the Needle” (my newspaper column) and wrote book reviews.

Free patterns enable the potential client to try out the product, write reviews and spread the ‘word-of-mouth’ to friends.

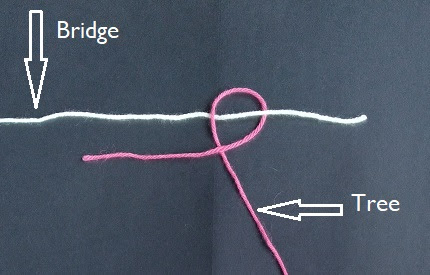
Software allows the illustrator to “tile” a large pattern into one that can be printed on A-4 or letterhead sized paper, matching the pages with “registration marks”: Often, circles divided by 4.

Older digital patterns may not match up exactly as the author intended – in which case, you get what you pay for. It may still be good but requires a little more work on your part.

What follows is my way of working with digital patterns:

 Tools and materials:

·         Double sided tape

·         Scissors

·         Push pins

·         A surface that a pin will penetrate: Foam tiles, insulating ceiling tile, cork,                                             or corrugated cardboard layers

·         A straight edge for lining up long edges

·         Paper cutter or rotary blade and mat (optional)

After printing you must trim 2 edges, to be able to overlap pages.

           Exception: Trim only one edge of first row.


Don’t rely on the edge of the paper to line up the cutter.

Instead, use the registration marks, and connect one end to the other with the ruler or blade.

Printers may not feed paper at exactly the right angle.

Apply tape within the margins: for example, between the page edge and the registration marks. Do NOT remove the paper backing from the tape. That comes later.


Burnish tape to paper with a card, bit of wood, or bamboo folding tool.

On the “edge” piece, the push pin is placed within the margin in the upper left. Thereafter, the pin is placed in the lower left. Left- handed people may do the reverse.


~I like to do the first row, taping the side as I add each page, then running the tape along the entire bottom edge of the row, without removing the backing paper. Then I cut the tape and paper backing separately, as explained below.~

With page positioned and push pin in place, pivot the page to expose the area within the margin, and apply the tape.

Do NOT cut the tape as yet.

Return the page to the correct position.


Hold page in place using a “spider leg” stance to prevent the page from sliding, pressing down firmly.

Grasp the tape backing and remove it from under the page.

Note that the pattern lines of the 2 pages connect, even if the registration marks do not. Check straight lines with a ruler for accuracy.


Do not cut the tape yet.


Burnish the page to the tape, just as you burnished the tape to the page underneath.

When everything is in place and secure, cut only the tape and not the backing. You may leave an inch or so of backing beyond the tape and cut it.

If you cut the tape and backing together, it may be difficult to separate them when you next use the tape.

If the tape sticks to your working surface, you can put down baking parchment paper, or a Teflon™ sheet under your work.


~~~~~~~~~~~~

When my pattern is complete, I trace it onto 24” or 36” tracing paper, and ‘true’ the pattern:

Measure adjoining seam lines for matching as the pattern indicates. Some patterns will instruct you to ‘ease’ a seam, in which case one edge will be slightly longer than it’s mate.

Check that adjoining corners are at right angles for a smooth join.

~~~~~~~~~~~~~

The Jade shirt pattern is a free download. It is a great basic block for lady’s shirt making. I plan to use Jade to practice techniques outlined in David Page Coffin’s The Shirtmaking Workbook.

Supply Sources:

 https://fabrics-store.com: Jade shirt pattern, free download

Amazon Books: David Page Coffin, The Shirtmaking Workbook

https://www.wesellmats.com: Foam tiles

https://www.talasonline.com: Double stick tape, and other paper craft supplies


As always, Have fun !

Monday, September 13, 2021

Sewing Season by the Sea

 The day after Hurricane Sally, we moved into the camper

on our lot on Mon Louis Island beside a bayou of Fowl River. 

It has taken some time.

It has taken much time to get settled enough to be able to sew

again. But the interval was worthwhile.


I am working again, and adding projects to the queue.

Among them are:

    Does cotton thread shrink?

    Fun with corded bias binding

    How to use digitally downloaded patterns

    Explore shirtmaking with David P. Coffin

    and what to do with multiples of one-yard of fabrics.

That's all for now, folks !!!


Wednesday, July 7, 2021

The Benefit of...

                                     …Knowing the Size of your Belly


My mother used to say “Elaine, your eyes are bigger than your belly”

Babies and their bellies
 

I didn’t have to look in the mirror to see that my belly was way bigger than my eyes. But that wasn’t the point.

Another cliché: “Don’t bite off more than you can chew.”

Then there’s cliché plus metaphor: “How do you eat an elephant? One bite at a time.”


Clichés become cliché by over-use. Sadly, we hear them so often; in so many different instances, we forget what they meant in the first place. What is the difference between a cliché and a metaphor?

One difference is:

The cliché becomes corrupted by repetition. 

The metaphor by being dismissed as fantasy.

~~~~~~

My favorite short, sharp object comes from the author of

7 Habits for Effective People, Stephen Covey:

“Sharpen the saw”

How did the saw get dull? By using it.

How do you sharpen it? by learning.

There are many ways to learn. Learning is basically problem solving.


We have a need we need to fill, what do we need to fill it?

“Location, location, location” 

“A horse, my kingdom for a horse!”

“Don’t bring a knife to a gunfight.”

“You can’t see the forest for the trees.”


“The devil is in the details” aka “The Money is in the Details”


“Perfection is for Publication” 


The lesson is true of any endeavor, but especially of classic fiber disciplines. 

The history of man using fibers in his battle

 to survive goes back to the days before history was recorded.

Context is everything.

Learn their code, then write your own code.

Young and Idealistic

When we know too little, every idea is grand, every thought profound. Eventually, we become aware something is lacking. Yet, we don’t know enough to know what we need. That is: Our eyes being bigger than our belly. In the early days of the journey, our vision exceeds our ability.  

Sometimes, we give up. The best times are when we rest, with an air of persistent uncertainty.

I may not know the answer, but if I ask the question, the answer might be provided. If I never ask the question, the dilemma fades along with yesterday’s clouds. We only discover the appropriate question by studying the problem and asking: What if I did this...what difference would that change make..?

Asking the wrong question is choosing the wrong tool. We discover our error all too soon and make mistakes. We stop – do we give up or do we rest, with an air of persistence?

We’ve been taught that mistakes happen. They can have consequences that turn our best efforts into a quagmire, or they can be happy accidents. How do we know the difference? Do we give up, or do we rest persistently, in the knowledge that science will prevail.

Science has checks and balances. Unlike ideas, science can be proven by more than one idealist coming up with the same answer using different perspectives. The more checking and balancing, the more precise science becomes. Sometimes the consequences of the wrong question are so insignificant, the best place to put them is among a great many facts. It won’t make them true, but it will make them so difficult to see, they don’t change the overall outcome.

Pure science doesn’t put food on the table. We forget ideas, while ideals are sustainable.

By applying those ideals to present day problems, creativity happens.

That is the time

 when mastery is discovered

 to have developed.

Then you publish.


Saturday, July 3, 2021

Great Fashion...

 ...for discerning women

My long time internet friend Terri has a delightful post on her blog today. She always does, but being in a nostalgic mood this morning, it especially resonated.

Her brand is MeadowTree Style.

Tea Towels as Inspiration!

To quote Terri,

"One of my favorite designers of all time is Lucienne Day. 

 A prolific and incredibly talented British designer,

she left her mark  the design world in the 50's and 60's. Today, 

I'm going doing a small review of all things; 

her tea towels."

Check it out!


Thursday, July 1, 2021

That Rascally Lifeline...

 There is much being said about lifelines in knitting. Always one to grab hold of help, I have been trying it, researching it, hating it, and loving it. 

I just hate it when I must avoid that line with my working needle while making a stitch. That's no problem after the first row.

The most interesting tip I found was to use interchangeable circular needles and tie the (thinner, contrasting) thread to the needle through the holes of each needle. You will find the hole near where the needle tip screws into the cable. I thought, sounds good, BUT...so I tried it. I was right about the 'but.'

If you tie the thread to both needles, you need double the amount of thread, because the line will go through your knitting twice. Instead, try tying the thread to your working needle, and not cutting it off the ball until you're at the end of the row. Be sure to leave a nice long tail and tie the ends to a "non-opening" marker. I imagine the person making the suggestion was thinking of a lifeline as you cast-on, but I see no point in that. If I am going to rip out to the cast on, I may as well start over.

The bad thing about doing it this way, is the thread will go through all your markers. That's OK if you have plenty of lifeline. Otherwise, after a row or two your markers will bind your knitting. To get around that, cut one end of the lifeline and add to it using a "Magic Knot" - I learned how to do that from Laura Nelkin. The 'Magic knot' really does work. If it doesn't, then you haven't made the knot correctly. If you use opening markers it would work - but who wants to "fix" all those markers? I have used the nearly spiral markers with the sharp little ends. They hurt my hands, and are easy to lose. 

Additionally, you need twice as many markers, or more, in the event that each row changes the position of the marker on the cable/needle.

Another way to add a lifeline is to thread your lifeline string into a tapestry needle and thread the line through the loops on the needle (or cable). The advantage of this way is you can avoid going through your markers.

The disadvantage is you can accidentally miss a stitch, which is no big deal, unless you just happen to miss that stitch with your needle as well. If you are ripping back to the lifeline, you could possibly lose the stitch.

"Blessed are the curious, for they shall have adventures!" ~Anon.

Little Jack Hero...

 What does Little Jack Horner have to do with heroes?

He taught me how to make a ball of yarn. I know it sounds silly. Anyone can wind a ball of string, but Jack's way is better. 

In the first place, I don't drop it. Secondly, it is wound firmly, but not so tight as to take all the lovely crimp out of the fibers, and third, it is fun to do.

Start by loosely winding around a finger. After a few wraps, remove the yarn from the finger and wind in the opposite direction, so the yarn encloses those loose loops. When you have a nice wad, transfer it to your thumb, and hold it there with your other fingers. Start to wind, giving the wad a slight turn as you wind. 

As you wind the yarn, it will build up around your thumb. Excellent!

If you are untangling the yarn as you wind, you can remove it from your thumb and put the small ball through any loops in your lap that want to make a knot. 

When you are done winding, pull the yarn off your thumb - and knit.


"Little Jack Horner

Sat in a corner,

Eating his Christmas Pie.

He put in his thumb,

and pulled out a plum!

And said

What a good boy am I!"

Wednesday, June 30, 2021

What if A Corrected Pattern is not like the original...

 It happens...

Sometimes a correction actually changes the pattern. Given that knitting is like geometry, and there is a right and wrong way, what do you do?

Most patterns have variety in them, be it stripes, or simply a change in texture. Therefore your change in the pattern may work out just fine. Maybe not. The only way to know for sure is to try it. Make a swatch if you're unsure of the outcome. Or, simply take the risk.


1. If you keep corrections near the beginning or end, the selvedges (in the case of a right side and a left side) and the outer edges of the center, you are less likely to have a mess.

2. Remember that there is a right and wrong side of the fabric. If the main background is a stockinette stitch, follow that pattern in your subsequent rows. Likewise any other obvious background pattern.

If you have used markers to note the pattern stitches, follow the pattern within that area. Be aware that the pattern itself may gain more stitches as rows progress. A careful study of your original pattern, or the chart will reveal that progression. If your pattern doesn't have a chart, I suggest you make one. Learning to make a chart is essential if you choose to master advanced knitting techniques. 

3. Lace patterns may be difficult to discern the exact background. In that case, whatever change you make, be consistent in following stitch sequences and rows. 

    I like to use blue markers for wrong side rows, and red markers for right side rows. The reason for this is simple: Red is my favorite color, and I love to go sailing. The markers in the Bay are designated:  "Red right, return." It makes it easy for me to remember. You may choose a different system.

    One way I am consistent is to always start a wrong side row - after the selvedge - with a purl stitch, and a right side row with a knit stitch. There will often be increases or decreases in lace, and the system may seem to cause an inconsistency. However, if my increases and decreases create a pattern my choice of  knit or purl will also lend a feature to the pattern. For example, if I increase 4 stitches on every wrong side row, and 6 stitches on every right side row, the knits and purls will be consistent, if not exactly like the original pattern.

   As Elizabeth at Radiant Earth Studios says: "You can always add a touch of magic.  It never has to be an either/or situation."


Monday, June 28, 2021

Yes, there is...Virginia.

When I wrote the post for June 19th, I wondered if I was exaggerating...

So I went out for some research, and found

Herbert Niebling, Knitter Extraordinaire.

My source was the trusty

                                     Piecework Magazine newsletter.


Mary Frances Wogec has written a wonderful article on this Grand Master of Knitting.

To quote the author: 

"Some of his larger table covers contain as many as 300 rows, with the outer rows comprising hundreds of stitches, all to be worked in fine thread from pages of complex charts."

He is credited with designing the symbols used for charts, 

making knitting patterns accessible to everyone, 

whether or not they could read the written word, 

without the barrier of language differences. 

If you read all the way to the end, you will find tips for contemporary knitters.

~~~~~~~~~~~~~~~~~~~~~~~~~~~~~~~~

As a lifelong fiber artist, author, illustrator, et al, the publications of 

Long Thread Media

have been a mainstay for my historical research before writing any article. 

As inspiration, I've gotten many ideas from the magazines,

 as well as re-visited techniques learned from life.

It is so nice to have a reliable source, 

especially in this day of 

advertising masking itself as education.


~May your scissors be sharp, your needles straight, and your threads strong.


Saturday, June 19, 2021

What if...

 A knitting Pattern has a longer repeat

than you can memorize...

If you don't wish to re-write the pattern,

you can break it down into patterns within the pattern.


For example:

 Yes, it is often printed that small with no spacing, 

in abbreviations!

That is 40 stitches! If I counted right.


Anything more than a local phone number is beyond me.

It  becomes:

knit, purl, knit

central-double-decrease

yarn over, purl 2 together, yarn over...


I solved my problem by printing out that pattern page.

I cut out one line, or even half of a line, using a craft knife.

Then I cut out my hole-in-the-paper with a generous margin all around.

I glue the paper to heavy paper with rubber cement, 

cut out the hole and trim the edges.

Or I may cut out “L” shapes, so  my frame is adjustable.

The frame is attached to my pattern with bulldog clips, magnets, or whatever is handy and works.


I’m happy to see so many gaining experience in the field.

I’m unhappy they have so little experience in the field.


To be safe, learn from a professional, or 2 or 3 professionals.

Just as you wouldn’t choose a map prepared by the novice mapmaker. 

Remember those cheap GPS devices? Don't ask.

An inexperienced map designer may not know the terrain well enough. 

For instance, they may not realize that 

the bridge ahead is a toll bridge, 

and the toll road is barricaded, 

only open 3 months of the year.

Or that the bridge may have washed out 

during last night’s rain. 

That’s how places like No Name, Colorado come into being.

Don’t let the locals try to tell you it comes from the NoName Native Americans. 

That tribe doesn't exist.

(pronounced: Noe Nahmee).


Currently, I am learning from Laura Nelkins at http://www.nelkindesigns.com.

Her patterns range from the very beginner to intricate lacemaker. 

Some of the more complex patterns have many options – to add beads, or not. 

How many beads to add and where? 

Along with some variety in sizing. 

She has “knit-alongs” and clubs. One club is for those with deep pockets, 

another for those of us on a budget. 

She uses pattern testers and publishes nothing until it is perfect.


 As usual, the pattern I have used is not a real pattern.

Happy Knitting!


Wednesday, June 16, 2021

From the Test Kitchen - Appliqué Needles

Clover Black Gold Needles


A well designed Needle makes all the difference

When I first saw these needles, I thought "What's the point in having a coated needle? Surely there are ways to minimize the chance of a rusting."

Then I set aside my quilting "betweens," and tried them. It felt as if the needle didn't slide through the fabric as smoothly, but it wasn't a problem. So I continued adding a different color silk to each needle until all were in my linen needle book.

I  live in a warm and humid coastal area and have found that cotton or wool needle books will hold the moisture and cause the needles to rust, while linen, though absorbent, dries quickly.


What to do when...


You must modify a pattern without changing the stitch count ~

-from the diary of a brain damaged creative.

            Sometimes, you just need to make changes. Perhaps your creativity angel is poking you and the only way to get her to stop is to pay attention and do as she demands.

But with knitting, you can really go off the rails making changes when you don’t know what you’re doing. The main thing is stitch count. If you have a stitch dictionary, you’ll notice that all the patterns have a set stitch count. It may be “Multiple of 7 plus 4." When I see that, I know the pattern is symmetrical, and that it takes 4 additional stitches to even things out at the end of the row (or repeat.) The smaller the repeat of the stitch and row count, the safer it is to modify: Stockinette stitch is 1 stitch (knit on right side) one row, and another stitch (purl on wrong side) on the next row when knitting flat. To further complicate things, if you are knitting circular every row is knit - making it easy to modify. Garter stitch also lends itself to modifications, being 1 stitch (knit) on every row, but knitting circular you would knit one row, purl one row. A border of 22 rows – each row with a different stitch count would be difficult, if not impossible, to change unless the 'pattern' changes will match the main body of the project. For example: your project ends with 3 major parts (right side, back, left side) but the border pattern is a repeat of 8 plus some. Three does not go into eight without having something left over. If the leftover is not equal to the "plus some" of each row it won't work. As much as we'd like to, there is no changing laws of physics to suit ourselves.

 So let’s stay safe out there! (to quote an old tv show)


How can I change a pattern without changing the stitch count?

            Enlarging: Requirements include having enough yarn. When you are satisfied that you do, you can gradually move up to larger needles. There is a sweet spot when it comes to needle size, yarn size and stitch size, so you will want to play around with swatches first to make sure your choices will work.

            Downsizing: This gets tricky but is generally easier than enlarging a pattern. A long-sleeved top-down pullover (jumper to my British friends) may be OK being cut off just below (or above) the bust. The shawl may work with a different, but narrower border provided the stitch count is compatible with the stitch count of the main part of it.

            Again, you can change the gauge by using a finer yarn and smaller needles. Swatching is necessary to know what will work and what will not.

            Felting or “fulling”: If you feel really confident you can shrink the finished item. This is scary but could conceivably work. Felting means to make felt while fulling is shrinking only a little to make the fabric look fuller. Be aware when shrinking that nothing really goes away – a shorter length/width means a thicker fabric. Note: It is possible that "fulling" was a historical term for blocking. Except woven items were fulled as well as knitted and knotted so that is debatable.

YIKES! You can see you will not have enough yarn – the dye lot is not available (or yarn was custom dyed) and you are on a deadline to finish this project. You are too far into it to rip it out and start over.

            Here is where it is helpful to have learned to analyze patterns: Examine the pattern repeats, count stitches, count rows – try to find where substituting another yarn or color will work. There are several options – or things you wish to avoid.

            Spotty color: A small consistent color change may result in polka dots that really don't play well with the over-all pattern. Small color changes may mean weaving in ends to the point of adding weight to the over-all project that changes the “look” and “drape.”

            Stripes: Whole rows of color change may result in stripes. The effect can be minimized by choosing the same color that is one step up or down in value (lightness or darkness). The goal is making it look intentional!

            Borders: A contrasting border might work. Consideration of color*, contrast** and harmony*** is essential to giving the final project the look of being planned from the beginning. ***”Harmony” means to pick up a color that is already present in the project, but not the main color. **”Contrast” means a shade lighter or darker. *”Color” means introducing an entirely new color that blends well with colors already in the pattern. These design principles, noted by asterisks, are specific to this article – there are more things to know about each one than is described here.

Please leave a comment if you found this helpful.

Monday, June 7, 2021

How to re-Write a Knitting Pattern for People Who Can't Read

How to set up a knitting pattern in Excel

for people who cannot read charts or written patterns.

This spreadsheet was created using Microsoft Excel. Other programs may be similar, but different in some respects. Any similarity to a previously published pattern is coincidental.

Set up the spreadsheet with column width at 4.0 to 6.0 and height at 25 – 30 (whatever you are comfortable with.) The size of the cells relates to the amount of information, and font size of the contents of each cell. Cells should be big enough for the least amount of info that can be understood and smallest font you can easily see.

Format the cells as "Text" so Excel doesn't auto correct your entries.

Table 1   A pattern that is not a pattern - only for illustration.


Run the cursor down the rows and right click. 
A menu should come up, with the words “hide and “unhide.”

                      The rows affected will turn green in the row count column, and grey across the sheet.

                                    Note the lifeline after End of row 1

 The “hide” feature allows you to hide some rows so you can place the row you are working on to sit just below the first row – in this case, the number of stitches. You “unhide” the hidden rows when you need to refer back to them, as you would when the pattern says, “repeat row 2.”


 Column A shows the number of stitches you have at the beginning of the row and the end of the row, so you can count to check your accuracy. A pattern may have an even, equal number in the right and left sides and an odd number in the middle if the pattern is symmetrical. It may have that an odd number on each side and still be symmetrical. Look for a pattern within the pattern.

Inst - look for instructions on this line. I merge cells above what the instructions refer to, then type the instruction inside the merged cell. I may have to change the font to make it fit.

I put a wide, dark border around my set of 3 parts to each row.

When I complete 20 stitches, (less on a bad day) or a pattern repeat, I place a marker.

I am never counting more than 20 at a time.

Column B shows the rows according to whether they are the right side of a garment, the center, or the left side of a garment. The different background colors of the 3 row indicate that the 3 rows group in the same knitting row.

Each cell indicates what you do.

K, knit; P, purl; O, Yarn over  - in a size 11 pt. or 12 pt. font

and p2tog in size 8 pt. font.

Increased stitches are shaded green, and only those show up as a double wide cell in the case of working 2 stitches together. “Make Ones” and “yarn overs” are shown as one stitch, because you don’t rely on another stitch to make the increase.

Most patterns have a beginning (selvedge) a middle (repeat) and an end (the other selvedge).

I only colored the background of the repeat, with any stitches that lead to or from the repeat written out. In this case I was writing a pattern for a “swatch” beginning with 16-11-16 stitches.

After the first few rows, I sometimes write out the repeats. Your pattern may only need the “selvedge” “repeat” and “selvedge.”

How to “freeze” the top (number of stitches) row: Select “View” in the tool bar and choose your options.


The Help feature in Excel provides more information on View, Freezing Panes, and Splitting your screen. I use all these features, and others. The tool bars have many options. It pays to take the time to learn how to use Excel.

The dotted line around my illustration indicates it is only a partial view of  an Excel tool bar.

Getting to work:

            Whenever I see an asterisk (*) in my pattern, I know it means to repeat a section, so I write it out in a part of my spreadsheet that is empty. As I write my pattern in the spreadsheet, I am constantly moving the “Assets” (things I will copy and paste) down the page.

Then I copy and paste it nearby (still not on a row).  I now have two of the repeat. One of them gets a colored background, the other is left plain. This is done so I can copy and paste the repeat as many times as I need – and still be able to see the original repeat sequence. Even the most complex patterns are “repeats” of a given sequence of stitches.

I may do the same with a short repeat placed in brackets “[k1, p1] three times”.

Please send me a comment if you have anything to add. This is in early stages of development so there may be changes later.

Abbreviations:

K         Knit

P          Purl

O         Yarn Over, making an increase

P2tog   Purl 2 stitches together, making a decrease

K2tog  Knit 2 stitches together making a decrease

Mr     Make 1 Right

Ml     Make 1 Left

[xx]   Stitches within a bracket for a short repeat, often within a repeat.

P.S. When knitting, I found that a magnetic board 

with a  magnetic strip works well. 

I also use a small square magnet to limit

what I see to just a few stitches. 

Then after each portion I check my work.

Don’t bother notifying me of mistakes in the content of the cells.

They have been made deliberately to stress this is not a pattern.

Visit me at Elaine (Lainy) Rutledge on Ravelry


Friday, April 2, 2021

DBDC/x

 
DBDC/x = Diary of a Brain Damaged Creative in the Unknown

I was born with the cord wrapped around my neck. The doctors  must have told my parents I would be brain damaged.                                                                                                                                        

Heaven forbid they give them any hope for me.

If I wasn't brain damaged at birth, I was by the time I left home, with only what I could carry.                                                                                     

If you think me complaining, you are wrong.

Because I didn't see myself as smart, pretty, or having any value whatsoever, I tried to learn what I lacked.                                                                                                                                                                                                       I learned to love learning as a hero loves his quest.

I've never completed the task, and have never fit in.                                                                                       

However, accepting that fact, I did whatever necessary to survive and be happy.

In my 70s, I've achieved that blissful state.

But then, I'm a slow learner.


Friday, March 26, 2021

How to ply yarn


How to “ply” yarn:

Why would you want to?

  1.   3 different shades of the same color plied together

            will produce a yarn with subtle depth.

      2.   Yarn is weak and breaks easily.

      3.   Pattern calls for worsted weight (10 ply)

            and all you have is 2 ply.

      4.  You want to blend fibers.

Tools:

DPNs in wood or bamboo

(DPN = Double pointed needle)

Whittling knife

Yarn

Optional: a wooden bead or wheel on one

     end of each DPN.

Instructions:

Carve a notch in the end of a DPN.


Attach yarn to DPN with a half hitch knot.

Spin the DPN so the yarn winds tighter – much tighter – til it curls up on itself.

Holding yarn so it doesn’t curl up on itself, undo the hitch knot and wind the yarn around the spindle – (DPN).

With two or more full spindles in clamps so they will turn only when you pull on them, tie the ends together on another spindle.

Wind the spindle the opposite direction to spin the plies together – or let them relax and spin themselves, a little at a time.

Tuesday, March 23, 2021

Circular Swatch Knitting

 Circular Stockinette Swatch

© Elaine Rutledge, 2021. Permission granted to reprint for educational purposes. Any reprint for profit will be prosecuted.

Yarn: Wool of Andes Worsted, cotton *fence yarn

Needle: size 7 plastic circular

Gauge 19 st = 4”

CO 29: – Knot *fencing yarn to tail  at end of cast-on:

19  pattern stitches and 10 (5 x 2) selvedge stitches.

Work 1 row, slide work to the other end creating a float and secure with a clove hitch. Tie the floating end to the fence*. remove the clove hitch, knit a few stitches, and cut the float.

Norah’s 5 Stitch Selvedges***:

1st Row: Sl-2 (purlwise) YIB, P1, K1, P1 work in pattern to last 5 st, P1, K1, P1, K2

2nd Row: Sl-2 (purlwise) YIF, K3, work to last 5, K5.

Repeat the row sequence.


 If you examine your work

at the end of each row, you can

fix mistakes sooner.

“A stitch in time, saves 9”


*Fencing yarn: Tie one at each end to ‘fence in’ your work. Cotton fence on wool will not ‘felt’, and vice-versa.

How to do it: With float secured to both needles (clove hitched to opposite side needle), using a strand of string or yarn, knot each row end with a double half hitch or clove knot. You can slide the row end up or down the fence to adjust the tension to match your knitting. Not too tight, not too 

loose. The floating yarn must be kept taut while tying the fence knot.

If you use 2 different colored fence yarns, you will always know which is the “right” side. Some patterns have no right or wrong side when finished. I sometimes let ‘habit’ take over and turn the work.


Work foundation row and 4 rows of your choice for a hem: It should be at least a 2 stitch, 2 row opposing sequence** to balance the stitches. If the hem stitch is not the same gauge as the stitch you are swatching, add or decrease stitches after, and before the hems to adjust for the difference.

The exception: working a swatch at least 8” square, measuring in 3 places, and taking an average count will compensate for the discrepancy.

**Opposing sequence: a rhythm of knits and purls that will lay flat without curling or distortion. For example: (1) garter, (2) moss stitch. NOT good: Stockinette or ribbing.

Work selvedges, then knit each row for circ stockinette.

***Norah’s 5 Stitch Selvedge might work for a hem. Adapted for circular knitting from The Knitting Cables Sourcebook, by Norah Gaughan.


Back Side of work. Take care to keep floats loose.

Otherwise, your corner will curve like mine did. 

First Clove Hitch fence knot step: With the bridge held taut

jump over the bridge and run in front of the tree.

Also called a Half Hitch

To do a double half hitch, do it again.

Subsequent Clove Hitch step: then jump under 

the bridge and go into the hole.

 (This is an example of an **opposing sequence. 

The first step is made in one direction 

and the second step in the opposite direction.)

Notes on the side fences:

Use contrasting yarn: if knitting wool, use cotton, 

or vice versa. Wool on wool will felt, and the float 

will not slide easily in the knot.

The whole idea is to be able to slide the floats

 along the hitch to adjust the tension when finished. 

The tail (illustrated as a ‘bridge’) must be kept taut 

when tightening the knot, or it will become entangled in the knot, and will not slide.

I turn my work to the back side to tie to the fence. It reminds me to work only on the front.

 Deepest gratitude to

Norah Gaughan, 

author of Knitted Cables Sourcebook

For sharing with me her

5 Stitch Selvedge stitch sequence.


Saturday, January 9, 2021

Back to Appliqué Basics

 After years of trying all the new fangled ways to do appliqué, I am re-learning the "right" way. Practice, practice, practice.

The project is a composition of two different patterns - the center medallion is:

Tapestry, by Urban Elementz, 

and the surrounding blocks are: 

Fleur by Bobbie Ashley. 

The Tapestry pattern is perfect for new and old beginners - one shape, 

many different sizes and placements. 

I remembered a teacher once saying: List the things you think you know and learn that first! 

Here is a photo of me re-learning how to take a simple stitch:


The method I am using reminds me of the way Ami Simms works. 

She accomplishes the same thing with an entirely different approach.  

I love her website. 

By holding the work this way, with the thumb on the unit, and the foundation rolling 

over the index finger you can see into the space to stitch. 

I am using silk thread, 100 wt. 

and have it tied in a knot to the needle. 

The back basted appliqué design on the foundation stays in place. 

I stitch next to it, being carefully to not stitch into it

It's easy to remove if I do, but why work unnecessarily?

Each stitch goes only through one layer of fabric, and the stitches line up. 

The needle goes into the fabric next to where it came out of the unit. 

When the thread is pulled taut, everything falls into place, like magic.

Notice my edge is not creased. I don't want to accidently crease in a tuck 

under the unit that will never lay right.