Thursday, October 20, 2022

More Knitting Progress

 I found a wonderful chart on Pinterest. When  I went to the source, I could see it was partial - which means to me that it has been ripped off someone.

Regardless, I loved it and will not share it. But it brought to mind, I needed to play around with cables again.

Since I re-chart everything to compensate for my 'traumatic brain injury' I had to come up with a way to chart the cables in a way that gives me a little extra help. Cables were not on my keyboard for knitting symbols, so I must do them by hand. 

This is the paper I came up with to make a 'key' - Please feel free to copy my template. It is PUBLIC, for free, as in, not selling anything.


This was made in "Paint" the free graphic generating device, and Excel from Microsoft.


Sunday, October 9, 2022

Conclusions of exercise: Bruno in a Beaker

 Next time - 

I won't 'activate' the Inktense color with a wetting agent until I consider the work 'done.'

    Layering color as you would with watercolors on paper may not work. Subsequent layers may not be permanent.

I will baste the fabric inside of the wooden frame, to allow it to lie flat.

I will "test" wash as many samples as necessary before working on the final piece.

    Maybe I will do two samples, and wash one vigorously, and one washed gentlyto test the permanence of the color. 

If I give these mug rugs as gifts, I don't want them spoiled with a first laundering.

How do I know to take that into consideration?

Think black silk boxer shorts.   

I may activate the Inktense with a liquid fabric medium, though it does add some stiffness to the fabric. I wonder: if I mixed it with water would it still work? Would it bleed?

Would gel outside the line of the painting help to control a hard line of color? 

With every answer, there are more questions.

Bruno in A Beaker

 What works . . . 


Orignal drawing and tracing to yellow tracing paper for transferring to the fabric. The cup in the original drawing was from a shiny cup in my collection. It would not show a good value study because it was too shiny and reflective. I chose another cup, as seen in the tracing.


Photo reference for the cup.


The sketch on the fabric using Inktense outliner. It washes away mostly. . . but not completely. Test it on your fabric before putting it down where you will want it gone.


First 'finish'  before washing out the gel.


After washing out the gel, perhaps not as gently as necessary. I wanted a good "test."


I didn't start from scratch, but really scrubbed, again, with a poly hot pad, or dishwashing scrubber (it came as a freebie with an order for the kitchen, not sure what it is.)


I re-did the coloring with the Inktense pencils, allowed it to sit overnight, and applied gel. It sat to dry overnight.

I applied white highlights in the eyes with acrylic fabric paint and added black toenails.

The cloth was removed from the frame when the paint was dry.

Following instructions on the acrylic paint box, I pressed it with my dry flat iron (no steam holes) on a polyester setting, for 3 minutes, moved the iron to cover the remainder of the image, and heat set for another 3 minutes. Instructions were to heat set for 3 to 5 minutes, so I felt safe. The number setting on my iron was a '2.' Instructions said to use 212° f, but I can't figure out how to measure the temperature of my iron.

After the fabric cooled, I put it in a tub with wool yarn shampoo - only because I felt it would be gentler than an alkaline detergent. Cotton would ordinarily call for synthrapol or hand-washing dish soap for washing. 

Why? Wool Wash for animal fiber, and an alkaline detergent for vegetable fibers. It's a science thing. 

It soaked with a few gentle swishes for at least 15 minutes, was rinsed, and hung outdoors under the canopy in the breeze. I put some clips on the lower edge to add a little weight. 

Before I added clips on the bottom, I noticed the breeze had folded it up on itself.


Even at a distance, you can see the color remains brilliant. I am satisfied with an acceptable first piece. It will be finished as a 'mug rug' for Bruno's Mom, who lives in the Philippines.

Friday, October 7, 2022

Stretching Fabric for Painting

Update: This didn't work. I think the color needed to be pressed into the fibers/fabric better. I will still stretch the fabric but will reverse the front/back so the fabric can lay on a firm surface to apply the color.  

Other possibilities:

1. Gel was not washed out completely

2. I used a rubber-type hot pad that had many little fingers, and scrubbed to get all the gel

 out. It may have been too much scrubbing.

__________________________________________________________________


I use adjustable stretcher bars, but can't recall where I got them. I've had them for years.

Starting with a 10" x 10" square of Kona "snow" fabric, that has the main lines of the image traced to the fabric. Some areas have been traced with the outline pencil that came with my set, and other areas are traced with the Inktense color I will use, where I don't want a black outline.


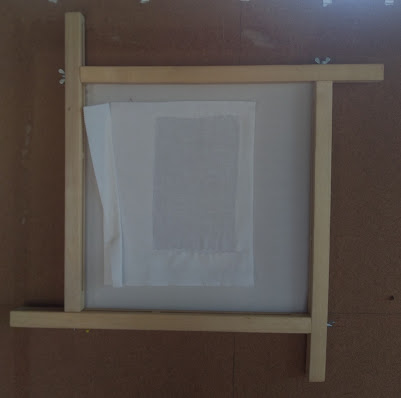
Front of stretched fabric


A large piece of cloth is intended for stapling to the bars, to protect the background of the piece, with a window cut away. Before attaching my stretcher cloth to the bars, I stitch the project fabric to the cloth on the machine using the longest and widest zig-zag stitch my machine will handle.


Back Side

New Series: Exploring the Techniques of Fabric Painting

An Overview 

Fabric, art medium, and wetting or binder agents all work together to produce the results you want to achieve. Therefore, before attempting a final rendition, I experiment and explore as many variables as I can think of to reach my goal: Which as always is, Whatever Works.

With a nod to my memory loss/learning disability, I document the results with notes, photos, and swatches, and those images will be shared with you as soon as Google lets me.

When I embarked on a search for tutorials and information, I was frustrated by the limited data in support of the recommended methods being presented. In the spirit of giving too much information rather than too little, I will explore the subject in depth. It will be too much information, too much reading, for some. For those folks I say - you never know when you will need that information in the future.


About Fabric:

Each piece of fabric is unique. Notable differences in cotton fabrics are

  1.  Spinning and weaving methods
  2.  Finishing or sizing
  3.  Size of the thread 
  4.  Number of threads in the warp and weft
  5.  The "hand" - is it soft or firm to your hand?

Thus, I play around with the fabric I intend for my finished piece to discover what works, and what needs more work.    

I  tested Kona and Batik to see if there was a big difference in the weave, by scanning a swatch of each at 600 dpi. Batik (bleached) fabric is a much tighter weave than good quality quilting cotton. I'll use Kona or another quilting cotton for needle-turned appliqué and bleached Batik for raw-edge or appliqué that will be ironed on. 


Considerations: 

The fabric must allow for absorption of the wetting agent, whether water, gel, or fabric medium, while not absorbing so readily that bleeding occurs. I found that stretching the fabric on my adjustable stretcher bars (stitched to a larger cloth that has a window cut out for the painting) allows me to check the back side for good penetration.

Bleeding vs. Blending: 

    Bleeding is when the wetting agent spreads beyond the intended line.

    Blending is what happens when a stroke picks up color from the surface and lays it down on the next stroke. I keep a piece of toweling and water handy to clean the brush often.

Resists: Starch, dried Gel, or other things that prevent the fabric from absorbing the ink.

Over-starched fabric will not allow the absorption of dye and wetting agent well enough for making the image "wash-fast." Some fabric sizing is enough to 'hold the line' but may not allow for maximum absorption

Additionally, Aloe gel that is applied and allowed to dry acts as a resist, much the same as heavy starch:

    I thought I would 'set' the lightest color with gel before proceeding with a darker color to prevent unwanted blending. Then the 'aha moment' came and I tested a piece of fabric with and without gel, and color on top of gel on color. Any color applied over dried gel washed away easily. There was some staining, which tells me I can't rely on the gel as an intentional resist. Fortunately, because my piece was stretched in a frame, I was able to wash out the gel without losing all of my traced lines. We will talk about options for tracing the design to the fabric later.

    How can I use this to my advantage? Let's explore the ways . . .