 |
| How would you like a beautifully shaped border on your quilt? |
 | ||||
| Or an inset to focus on a special applique or embroidery? |
I have been using shaped piecing to embellish children's clothes, and make baby quilts since the early 1980's - when I was taught to do "Drunkard's Path" and decided there must be an easier way to do it.
Then I thought, why not work on a larger scale...a bed size quilt?
It only looks intricate - but is actually very easy, if you take it a step at a time.
Cut a template, and draw the shape on the piece of fabric that will be on top.
Cut the shape out, with about 1/4" allowance for turning under.
Using the template and a medium hot iron, press under the raw edge. Test the iron on a piece of scrap template first. If the iron is too hot, the template film will warp.
Lay the top piece of fabric over the contrasting fabric
and press with starch, then pin.
Set the machine to a blind hem stitch, and adjust to a long length of stitch.
This is called "top basting" and the stitching will be removed.
This is how the back and front side of the fabric will look
after you have "top basted" the two pieces together.
Trim the seam allowances to about 1/4"
Lay the two pieces of fabric right sides together and smooth out the crease in the top piece.
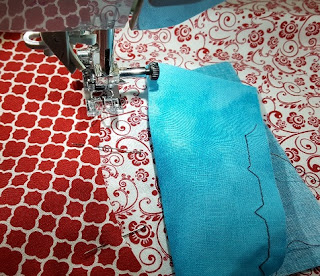
In this illustration, I have drawn "between the dots" with a marker for clarity.
Working only an inch or two at a time, smooth the seam allowances and stitch from dot to dot.
The point in this pattern is a little tricky, but practice it. You may wish to sew from the other side when doing the point. Take is slow and easy. No stress.
Remove the basting, and press on both sides. Enjoy your border!
Stitching a closed circle, oval or other shape is even easier.
Use the same method of top basting.
Be reminded that the text and illustrations presented on this page are protected by copyright.Please feel free to use the methods shown,
however, if you share, or teach the information, it is only fair to name me as the source.
I am retired, and do not sell. But I am dedicated to furthering education
in the fiber arts in any way I can.


No comments:
Post a Comment