
Sunday, February 5, 2017
Paper Doilies
I've been cutting out paper doilies - aka paper snowflakes - from freezer paper and ironing them onto construction paper. I am trying to build a library of Free Motion Quilting ideas. - One idea, that is shown on the backside of one page, was to fold the paper only once, draw my name and then cut it out. The blue paper is one I decided to use from a Harriet Hargrave book that includes quilting ideas.


Thursday, February 2, 2017
Tips for Quilters

This is a photo that illustrates many sewing tips for the Third Weekend In October quilt pattern by Ruth Powers Art Quilts. I loved this pattern so much, I enjoyed re-drawing it on graph paper and coloring it in. That exercise gave me a lot of answers and was most helpful. In the photo above, the smaller "map" is a portion of that pattern cut into a specified number of units. The units were laid out and stitched in order - then they were put back on the design board and checked for accuracy.
FMQ THE SNOWFLAKES!!!

Remember when we would cut paper snowflakes from folded paper? Living in the desert - those paper doilies were the only snowflakes we ever saw.
1. Cut a square of freezer paper the size of space to fill with free motion quilting. Fold it in half, half again, and again until you have tails - cut off the tails. This will give you a rough circle.
2. Unfold paper and refold into 4-8 equal segments - start cutting. This is the fun part. Be sure to snip a wedge out of the center so you can line it up with the center of your space.
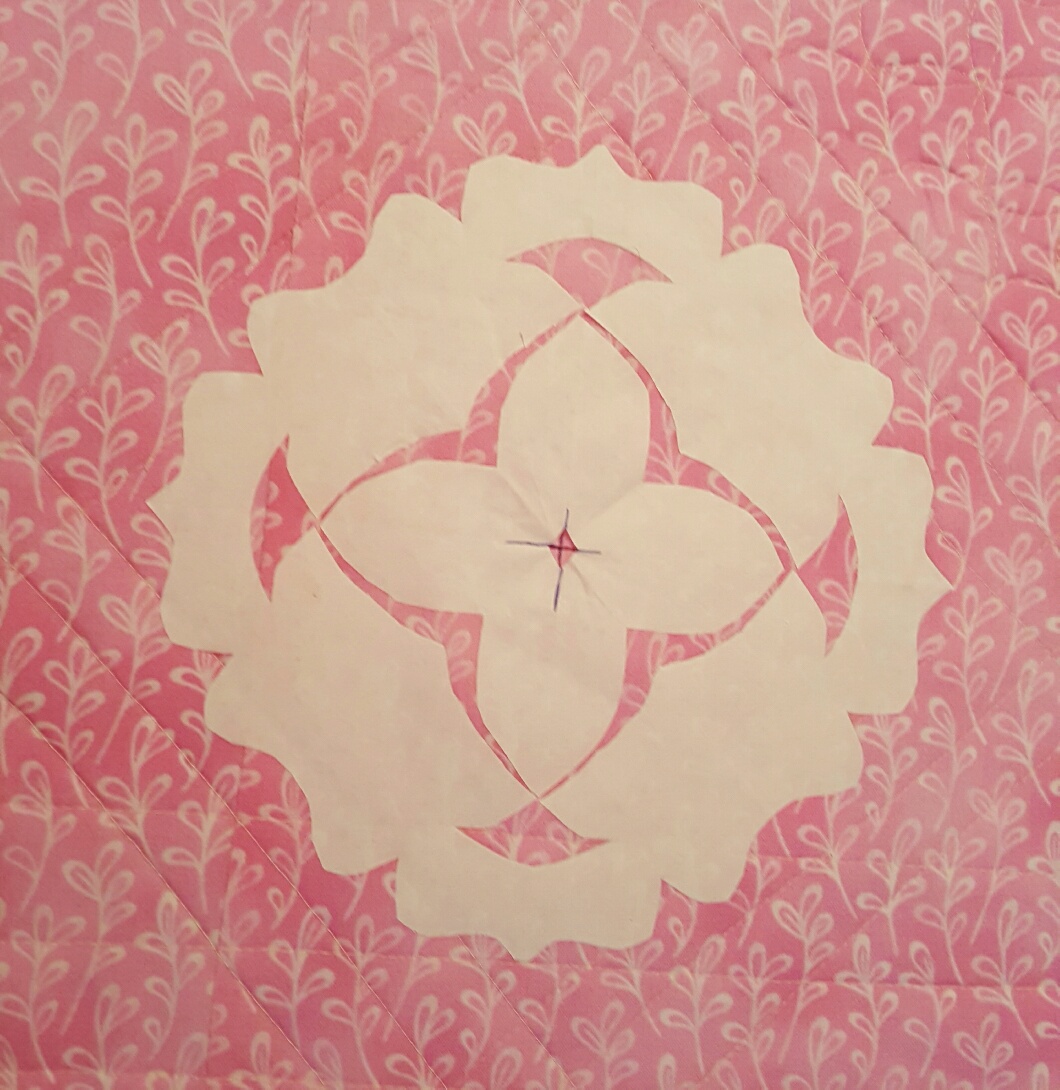
3. Fuse the freezer paper to the fabric with the iron. You can then cut more detail without losing the position if you are careful. I just nudge the point of the scissors under an edge.
4. Quilt around the motif, add as much detail as desired. You may wish to stop and start more than once to get the effect you want. When you are done, if you have been careful you may pull up the freezer paper and use it again, but I prefer to cut a new motif.
This is also a great way to practice your FMQ-ing. Set the machine speed at the slowest, and quilt with a mindfulness of the length of stitches in relation to the speed. Speed the machine up a little if it feels more comfortable. I wear rubber (latex) gloves when FMQ-ing If my hands are dry, I may apply lotion before putting on the gloves. When I cook, I use gloves frequently, and after using them on a food product, I will let them dry and stash them by the sewing machine for double duty. Just can't stand waste.
I wanted to practice stitching feathers - so I folded the paper square in half on the diagonal, and in half again. I drew a feather shape on the folded edge and cut it out. This gave me two feathers, which I used, re-positioned and used again to make a cross shaped feather. Echo quilting is also an option.
I am having so much fun with this alternative to tracing patterns, and marking the fabric. I'd rather be sewing, wouldn't you?
If you want a more detailed "pattern" you can make a double bladed cutter by taping two hobby knife blades to a popsicle stick. With extremely simple shapes you can sew, and move the shape numerous times for complex looking quilting motifs. Squares, circles and triangles give you endless design possibilities. The simpler the shape, the more creative possibilities there are.
About that cotton quilting thread - even expensive 100% cotton will rot eventually. When your machine acts up - check your thread. If a gentle tug on it breaks the thread, chances are it is too old.
Saturday, January 14, 2017
Shortcuts (and longcuts) for the Third Weekend In October Quilt
Those who know me also know that I work on several projects at one time. Being semi-retired, I can make that work, while I could not when an employee. So I am going to use this venue to make notes that can be shared with others doing the Third Weekend In October quilt pattern designed by Ruth Powers Art Quilts. Click on the underlined words, and a new page will open to her website. I have already made the quilt, and enjoyed it so much I decided to make it again, improving on my piecing, pressing and quilting skills. The process of dissecting the pattern, studying it and re-drafting it to suit my methods have given me insight I only wish I had before I began my first one. I have searched for a way to share this information without infringement on Ruth's copyright. The only thing I can come up with is that with proof of purchase of the pattern I will communicate with others privately. it was well worth the journey. I have a Facebook Page in my name, Elaine Rutledge through which others can PM me and we will try it. Ruth has long since gone on to other wonderful quilts. If she contacts me to restrict or amend any of this, I will respect her wishes. What I can share is not a replacement or substitute for Ruth's pattern. It only builds on that which she has already published. The questions I can answer include:
1. How many large leaves will I make? How many leaves does a fat quarter of fabric yield?
2. How can I maintain a correct grain line when doing foundation paper piecing?
The answer to that is I have found it is easier to make templates, and use hand piecing methods to line them up, then machine stitch.
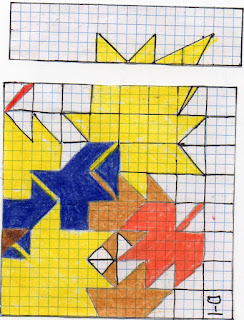 This is a portion of the "map" I am using to piece the units. I re-drew the entire pattern on graph paper and colored it with my Prismacolor pencils. Then I cut the pattern into the 64 unit blocks, and piece according to that section of the map. It has been a big help to do this, in spite of all the time it took. I can immediately spot an error.
While I construct a "block" the units are on the batting covered design board, with sections of the map attached close by.

1. How many large leaves will I make? How many leaves does a fat quarter of fabric yield?
2. How can I maintain a correct grain line when doing foundation paper piecing?
The answer to that is I have found it is easier to make templates, and use hand piecing methods to line them up, then machine stitch.
Today is February 5, and I have completed 3 blocks of 64 2-1/2" units.

While I construct a "block" the units are on the batting covered design board, with sections of the map attached close by.

The 36" square bulletin board is perfect for a design board that is very portable.
Eventually, I will attach it to a rolling clothing rack so I can move it between the cutting table and sewing area.
Wednesday, December 28, 2016

Friday, December 9, 2016
How many will I get?
December 9, 2016
Working on the Provence Mystery...figuring out how many strips cut 2" by 20-22" are needed for the 4 patches. One set of 4 patches (221 units, neutral on neutral) and one set: 168 Purple on Purple. 45 Strips for the n/n and 34 strips for the p/p. Scrappy vs planned yardage? This method gives me the advantages of both techniques, without having too many units left over.
Source: Quilter's Academy, Vol. 1 by Harriet and Carrie Hargrave.
Working on the Provence Mystery...figuring out how many strips cut 2" by 20-22" are needed for the 4 patches. One set of 4 patches (221 units, neutral on neutral) and one set: 168 Purple on Purple. 45 Strips for the n/n and 34 strips for the p/p. Scrappy vs planned yardage? This method gives me the advantages of both techniques, without having too many units left over.
Source: Quilter's Academy, Vol. 1 by Harriet and Carrie Hargrave.
Wednesday, November 30, 2016
How many 2" squares do you get out of a Fat Quarter?
http://quiltville.blogspot.com/p/en-provence-mystery.htmlSo much has happened since my last post - Most recently, I got a new Juki F600 machine, and Harriet Hargrave's book, Vol. 1 Quilter's Academy. Between the machine and excellent instruction, I feel like I am learning to sew all over again. Two quilts were finished and gifted in the past year, and I am ready to start Bonnie K. Hunter's Mystery Quilt for Dec. 2016.
First question...how many fat quarters would I need to do the neutrals in Clue 1?
 Answer:
I will assume my FQs are not cut straight so I will plan on getting only 8 strips out of 18" of width.
Each strip is 10" long. thus I need 5 FQs plus 5 Strips for each tint of neutral.
First question...how many fat quarters would I need to do the neutrals in Clue 1?

I will assume my FQs are not cut straight so I will plan on getting only 8 strips out of 18" of width.
Each strip is 10" long. thus I need 5 FQs plus 5 Strips for each tint of neutral.
Subscribe to:
Posts (Atom)