Wednesday, August 23, 2023

Lemonade !


                                    The Fashion Show

 Before I started this series of posts I took a lesson, or two, from 

Jane Snedden Peever,

https://www.jspcreate.com

"They" say a good teacher is one who inspires.


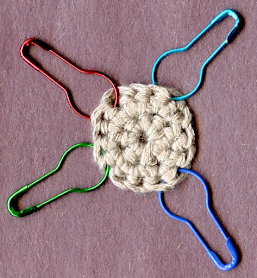
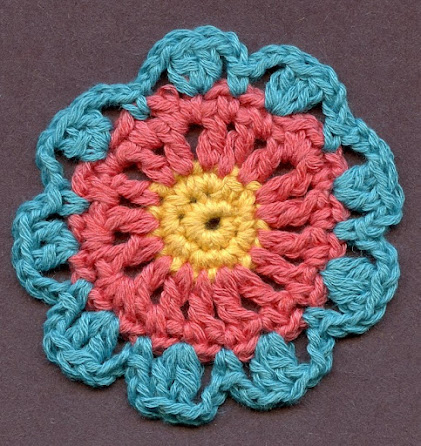
The above circles are wine cozies. I drink wine, with ice. The condensation 

on the stemware glass - even the plastic ones - would drip on my clothing.

And since I was already playing with crochet, I solved my problem by 

making wine cozies.


The thing about a TBI is, you think you can do things,

 and discover that skill is gone . . . 

So you have to figure out a way to make your ideas work.

Anyone can do anything with mindful effort, 

and a willingness to keep at it.

Never feel sorry for a 'disabled' person. 

Instead, rejoice with them in their accomplishments,

However small, in your world.

In their world, it is HUGE!

So this post is about mistakes. . . 

and how to live with them.

If mistakes are not 'your thing' - skip this and go directly to the previous post.


While practicing making centers, I made this. But,

I need one more SC to make a center that can be

divided by 4.

In the next row, "SC2 in ea. st."

I must make 3 additional stitches: 

1 for this row

and 2 for the next row.


I learned that by trial and Error!!


This piece is a real mess! 

It started ok, but in the orange row, I have 17 DCs.

So, using the same color, I added what I thought would be

the correct number of stitches.

Wrong again!

While it will never be a square, 

I can use it as a circle.

Notice the blue row . . .

        I wanted to go high and low but experimented using only a chain, 
        a double crochet, and a single crochet (which I knew how to do).

        If a single crochet is one high, and a double crochet is 3 high, 
        how many chains are needed between them? That was the challenge.

        My first guess was 3 chains. Wrong again!

        The second guess was 2 chains up, and 3 chains down. Success!

Why? 

Going high, I already had a single crochet (count as 1), but going low, I am taking a double crochet all the way down to my foundation row.
        
        Maybe. I don't care, it works.

        Will that formula hold true for a smaller diameter? Try it and see. 
        
Sometimes, you just have to play. 
A 3.5" circle is small enough to finish quickly.
When I would make a mistake, or I didn't like
 the way the row would 'lay' it 
was quickly ripped out 
so I could try something else. 

My only rules were 
to keep the size of the circle consistent 
and do whatever 
felt like something I wanted to try. 


My circle is already too big to become a square. I had planned to have an odd number on each side, I have an even number. Do NOT count the corners!

The yellow lace is too lightweight to go with 2 rows of solid DCs. 


I will save it for a bigger square or circle.

The center of this one is from a pattern by Jane at JSP Creates.
I added rows to make it larger because I am using finer yarn and a smaller hook.


Making increases on a straight side:

Let's say I want a pattern that requires 7 stitches. 
If I put more stitches within that pattern, 
it no longer lies straight. 
I only need to increase by 4, maybe 5.

What does the original 'granny square' do? 

It puts the increases in the corner, and
 the middle until the repeat of the pattern on the straight side
can be fully repeated.


I will be adding to this as I find solutions to my mistakes !

Monday, August 21, 2023

Start row with a Double Crochet


When can you use a DC without a CH3 beginning? At the start of the row with a new color.

                You cannot use it to start a row within a ‘magic ring’ –

but you can make a magic ring, do a row of SC then start the next row with 

DCwoCH3 = Double crochet without chain 3.


Pull a loop through.

Do NOT make a slip stitch.


With the loop pulled up to be as long as a finished 
double crochet and pinch to hold it.
Make a chain stitch.


Work on the first step of the

double crochet.

Note: the hook is held 

vertical for clarity, 

but make the stitch with 

the hook at right angles 

to the work.


One loop and one double crochet.

Work the round as you normally would,

but do not count the first long loop as a stitch.

At the end of the row, work the first double crochet

(Or DC+CH1) as the last stitch.


Put a stitch holder in the last stitch 

made (black pin) and one 

at the top of the first DC (brass pin).

Pull out the loose end of the loop

until all that remains is the DC.


Join with an invisible join.


Completed pattern row.

With deep appreciation to Jane at JSP Creates.


Next up:

Lagniappe

Pronounced Lan-yap

Meaning

Bonus Material


Sunday, August 20, 2023

Crochet Olé

 Lay the groundwork for a pattern:

            I want my polygon to have 4 sides,

but I like each side to have an odd number of stitches:

start, center, and end.


I will start with a ‘magic circle’ and SC5. 

I put a pin in the last SC made.

Instead of a join, my circle is small, so I choose to make a spiral instead of a join, continuing the spiral until there are 10 stitches to my circle.

I could have started with 10 stitches in the ‘magic ring’,

but it squeezes up better with only 5.


            This is where the pin marking

 the end of the first row is important.


I could start my square with only 5 stitches in between the corner but that looks a little cramped.

I decided that 10 stitches give me more to play with, for a total of 44* stitches. That leaves 11 stitches on each side. Now I can make up a pattern of 11 stitches.


This is my center. It should count 10 single crochets.

I use a black pin to mark last stitch and gold for first stitch. Or vice versa.

Be consistent and you won’t have to remember. It will become habit.

Row 2: SC2 in each stitch. 20 total.

At this point, I need 24 more stitches. I could keep increasing by 10, then 4. Will an increase of 4 stitches keep my piece flat? Two more rows of stitches will begin to make my piece too large to have any kind of creative stitch pattern and still keep it under 4 inches.

Row 3: *SC2 in each stitch x 9, 3 SC in next st. *Repeat to end. 44 stitches.

If I want 4 sides, but an odd number on each side, I must have a base of a multiple of 4 plus 1, or in this case (4 sides) a multiple of 4 plus 4.

44/4=11

Correction!

Do not count the corners! So I needed 40 stitches. 

Each side has a corner and 9 pattern stitches.

The Bonus Material in which I illustrate mistakes

will appear after the Double Crochet 

without a Chain 3 in Part 3 of 3.

However, you want a straight side.

That means the increases come in the corners.


How did I know I wanted to make a spiral instead of a join?  A ‘magic ring’ instead of chains?

 I made five centers and chose the one I liked best.

 Yes, it is that easy.

Keep it under 20 (fingers and toes) and math is easy too.


At the end of Row 2, I had 30 stitches. 30 cannot be divided by 4 and come out even.

                                                30/4 = 7 + 2/4

If I want 7 sections I must subtract 2, and if I want 8 sections I must add 2.


Hmmm – does that work with, for example, 15/7 ?        15/7 = 2 + 1/7

Can I add 1 to 15 and get something that will divide by 7 ?

NOPE! But if I increase by 1 stitch, I can divide by 4 !


So, what else works?

15 minus 1 = 14, which can be divided evenly. If I want to divide 15 evenly by 4,

I must add 1 or 5 (which is the sum of 4 plus 1)


This proves the point, you don’t have to find your way out of a maze to solve a problem.

Another option is to start with a multiple of 4, and when I reach a pattern row, increase by 1 + plus the increases needed to go around the block.


Why does something ‘work’ with knitting or crochet that won’t work with a woven piece?

           Look at your yarn. It is one strand of yarn (most times). Now look at your stitch. 

It makes a loop. That loop comes out, goes around and goes back down. That makes 3 layers of one strand. That loop means that your finished piece will stretch or compact. Knitting is stretchier than crochet. It is the nature of the beast. When we want to make

 a stretchy fabric out of woven material, we over-spin the yarn, and that makes it crinkle up. We call the fabric ‘crepe.’ Think of a ruffled crepe myrtle bloom or skin with many lines: There are hills and valleys in that skin. It has lost its stretch, but the skin is still there. 

We are almost to the most interesting part. 

But first, I need to know how many stitches to increase 

in each row to keep my circle/square flat.

Let’s look at the classic Granny Square:


Row 1: Set up of ring and work CH3, DC2, CH3, *DC3, CH3. *to end. 

12 stitches and 4 ‘chain-3-spaces’. Join


Row 2: CH3, DC2, CH2, DC3, CH3, *DC3, CH2, DC3, CH3. *to end. Join.


.At this point it isn't necessary to count stitches. 

If the pattern is 'off' you will see it.

Next up . . . 


The DC Row without Chain 3 to start !

Friday, August 18, 2023

Crochet, Old and New

 Everyone has that special teacher. Mine is Jane at JSP Creates.


Review: 

This is for people who already have a working knowledge of crochet but may need some review.

 I am working on crochet in the round and want my piece to lie flat. The circle may morph into a hexagon, octagon or even a pentagon. If you want your polygon to end up as a square, you must work on a shape that can be divided by 4: An 8-, 12-, or 16-sided polygon. More sides than that, and you may as well make a circle, but it’s possible. The point is you can’t make a perfect square from a (5-sided) pentagon. With each new row, the circle or polygon gets bigger. You accomplish that by increasing the stitches on each row. A very small circle needs twice the number of stitches, but as the piece gets larger it takes fewer increases to keep the piece flat.

                 To increase you can make 2 or more stitches in one stitch*, or

                Make one stitch on either side of each stitch, 

                                          *which may be a ‘chain stitch space’.

                                            The top of a stitch lies between stitches.


If you have a row of DC+ch1, there will be 2 stitches in each space. This means that for each DC+ch1 (2 stitches) you now have 3 stitches: the DC of the previous row, plus 2 stitches (one on either side).


Gray row: DC+ch1 in each stitch.

Tan Row: 2DC in each space.


     Note that the first tan DC is created with 

                                        1 long chain 

                                                                        instead of a ch3.


In the gray row, can you find the ch3 that normally starts a DC row?

(You won’t find it because it isn’t there.)


Striped circles are great for learning the basics, but in time I need more of a challenge. To add variety to your piece:

1.        Combine stitches with spaces.


2.        Use a variety of stitches. Be aware that different stitches will have different heights.

a.       A slip stitch adds no height nor width (in theory).

b.       A chain stitch adds little height, but some width.

c.       A single crochet adds a little more height and width.

d.       A double crochet adds more height, not more width.

e.       A triple crochet adds yet more height, not more width.

f.        A multiple of double crochet in one space adds width, not more height than a single double crochet.

g.       A cluster of double crochet can add height and width but covers the area of one stitch at the top and bottom.


3.       Combine items #1 and #2 to create a ‘pattern.’ A 'stitch, ch 3, stitch' in a single stitch or space will create a corner, changing the circle into a polygon.

By starting with a small circle (that will become a 3” or 4” square) you can resort to ‘trial and error.’ If you don’t like the look of what you just did, it is easy to rip out and try something else.

“Start with the End in Mind”

One of Stephen Covey’s 7 Habits of Effective People

“Every step you take, every stitch you make” – no one is watching you. Do what pleases you.


A bad start almost never ends well . . . 

The key here is "almost" . 

   To be continued.

Post Script:

Something to remember when learning a new technique: focus on one thing at a time. The first time you work it, the quality of the stitches may be wonky. That’s OK. Designers don’t publish first drafts. Tackle only one thing at a time. A photographer may take 1,000 photos to get that one ‘great shot’.

With that in mind, be aware that I am recovering and re-learning after a traumatic brain injury. Before the incident, eight years ago, I was a professional designer/writer and illustrator. As a freelancer, I had to learn many different disciplines. Retired now, I provide this information for free and hope it is shared. There are mistakes in my work - I do that to see who is paying attention. (I wish). Actually, I love mistakes. We learn more from our mistakes than we do from our successes. 

If my work doesn’t look as wonderful as that of designers who are publishing patterns, it may be because this is a journal, of a journey to recovery. I don’t work on any one discipline long enough to develop mastery. There may be months between posts. It happens that way.