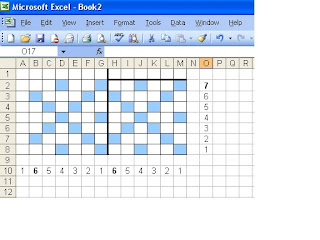
I have Microsoft Office Excel on my computers and use it to chart patterns, and plan colorways.
With a new workbook, I format the row and column width toform small squares. The Row height stays the same as the default. The column width is changed to about 2.43. Now my page looks like graph paper would.
Using the basic border, select an area and put borders on each cell.
Go to "Tools" - open the menu and select "Options" and in that menu, select the color tab. You can now create your own palette, by clicking on a color within that menu, and selecting "Modify". Your next choice is "Standard" or "Custom". On the lower right is a block that shows both your old color and your new color for comparison.
After choosing my colors, I plan the design. If the repeat has 6 stitches, starting at the right (because I knit right to left) I number 7 cells (squares) at the bottom of my bordered area. To the right of my grid, I also number from the bottom up, the number of rows it will take to make the pattern. The section of grid needed to make one pattern repeat gets a fat border around it to isolate it.
The illustration shows a very simple pattern to give the general idea. The method can also be used to chart stitch patterns, using wing ding or zbat fonts instead of color to denote stitches.

